
1. NEW Create Emails – Enhanced Email Functionality
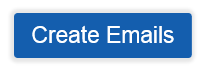
Create Emails Button
RideShark has just released enhanced email functionality that has been posted to your Admin Portal. It is available through the Create Emails tool button located on key reports.
The new enhanced integrated email functionality offers the following benefits:
-
- Ability to Create Emails directly from key Report pages, using the filter options to select desired email recipients
- Ability to send emails to all members of carpool or vanpool groups
- Ability to send emails to Administrators
- Ability to send up to 10,000 emails at one time
- Save Email Template — emails can now be saved for future reuse
The Create Emails button is available on the following Report Pages:
-
- User Account Status
- User Profile
- Carpool IDs Report
- Carpool Membership
- Vanpool IDs Report
- Vanpool Membership
- Challenge Members
- Manage Administrative Users
- Idea Center Email Tool — for custom TO lists (no user filters)
Automatic Checkbox options
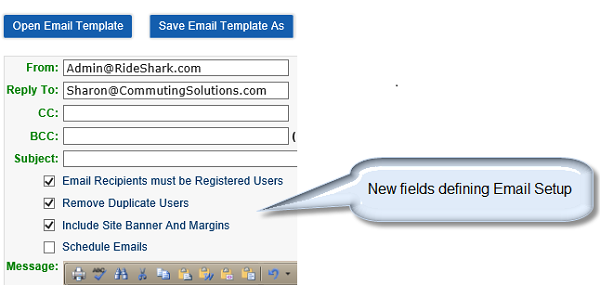
New automatic check box options have been added to the Email tool to aid in email creation and sending, as follows:
-
- Email Recipients must be Registered Users — checking this box will require that all users are registered users and are included within the database. If all users are registered users, the Administrator may include merge fields in the email message content.
- Remove Duplicate Users — any duplicate users will be automatically removed from the “To” field
- Include Site Banner and Margins —checking this box will automatically include the banner associated with the site, or subsite, based on the Administrator creating the Email. It will also automatically include margins. This banner will only appear when the email is sent, not within the email creation message box
- Schedule Emails — checking this box will allow for scheduled, timed delivery of the email by day, time and timezone. Note that up to 10,000 emails can be scheduled at one time. If more than 10,000 emails are required, create multiple scheduled emails with different user groups.
Create Emails – Key Steps
-
- Go to the Report Page that best relates to the users who are to receive the email (e.g. if you are sending an email to Administrators, start from the Manage Administrative Users Page).
- User the filter options available to select your desired users to email. Note that if no search filters are used, the system will assume that you intend to email all available users (based on the starting report page)
Important Note:Use the dropdown filter options to select your desired “To” recipients as this is the quickest way to filter data. If you use the blank search option, please expect to wait a few minutes for the results to return as the system must check every field in the database for your search criteria.
-
- Click the Create Emails button. This will open the email tool.
- By default, based on your Admin Login Credentials, the system will prepopulate the “To” and “Reply To” fields. Enter your desired Subject Line and Email Message Content, using the Merge Fields only if all users are registered users.
- Use the new automatic check box options to define your email
- Save Email Template Click the Save Email Template As button to save your email set up and content, if desired. The Save Email Template will only save the email set up and message content, not the “To” list.
- Add recipient emails in one of two ways:
- Email recipients will have been automatically added to the TO field based on your defined search criteria and filters set before you clicked on Create Emails.
- Add recipients manually by separating each email address with a comma or entering one address per line
Note: Users’ alternate emails will automatically entered into the CC field should there be one
-
- Validate “To” Email List. Clicking this button will validate all emails in the To List. Remove emails where an error was detected. Hint: if there is a large “To” list, copy the list to Excel, delete the row number identified and then paste the result back into the “To” list.
- Send/Schedule Actual Emails
- View emails sent in the System Emails Sent report
Important Note: The Show Email Tool currently offered only on the User Profile Tab will be removed on April 28th. The email functionality on this report page will now use the “Create Emails” button.
If you have any questions please contact info@RideShark.com
2. NEW Enhanced In-System Messaging
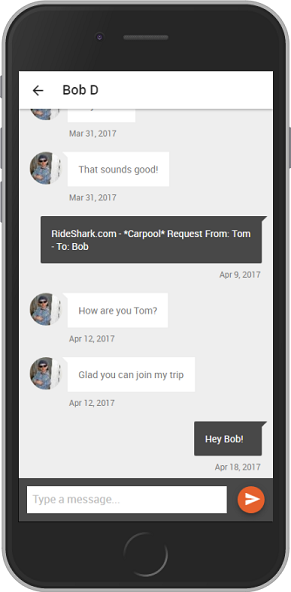
RideShark has just released enhanced in-system messaging that is formatted to better encourage and support communication between users.
For those with the mobile apps, the messages now look like typical text message threads:
3. Reminder — Review your Administrators
Just a reminder to periodically review what users are set up as Administrators. RideShark notifications are sent to anyone designated as a full Site Administrator. We’ve noticed that there appears to be Administrators enabled on some sites that may no longer be valid. Please visit Site Configuration — Manage Administrative Users to review active Administrators. Delete or set as Inactive if the user should no longer have administration privileges.